SMMK MacroPad by sferdous321
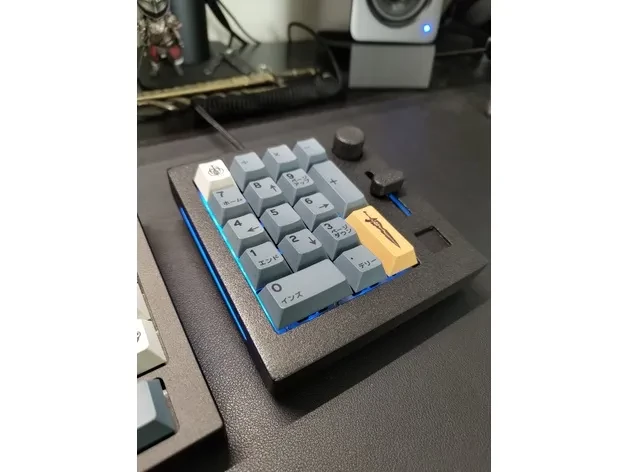
This macropad is a re-designed version of the GMMK Numpad. This numpad/macropad was designed to match the appearance of the GMMK Pro Mechanical keyboard. The main differences between the genuine one and this one are the corner radius and height plus the board angle from it's resting surface. Part List: 3D Printed Top and Bottom Casing 3D Printed/Purchased slider and knob, knob slot and emblem slot The knob was designed by prcy_ https://www.thingiverse.com/thing:4865375 I do not take any credit for that. Switch Plate - Need to be purchased from Glorious Websitehttps://www.gloriousgaming.com/products/gmmk-numpad-switch-plate Main PCB and USB-C adapter - Need to be purchased from Glorious Website PCB https://www.gloriousgaming.com/products/gmmk-numpad-south-facing-pcb USB-C https://www.gloriousgaming.com/products/gmmk-numpad-usb-c-pcb A frosted acrylic sheet (1/8 inch or about 3.2mm thick) or something similar for the side bars - Use the template to trace the outline M3x5mm(OD) Brass Inserts (4 pcs) - You can use different inserts but the holes need to be adjusted M3x12mm Screws (4 pcs) M2.5x6mm self tapping screw (2pcs) 3.7v 1200mAh Battery (Optional - only if the wireless function is desired) Make Sure Device Polarity Matches with Battery Pack! Reference https://www.amazon.com/EEMB-Battery-1200mah-Rechargeable-Connector/dp/B09G2S88Q3/ref=sr_1_4_sspa?crid=1AGK40JFYZ00N&keywords=1200+mah+3.7+v+battery&qid=1695046818&sprefix=1200+mah+%2Caps%2C134&sr=8-4-spons&sp_csd=d2lkZ2V0TmFtZT1zcF9hdGY&psc=1 Foams (Optional) Assembly: (This is just for reference - Follow what is best for you) Assemble the Main PCB and the switch plate Screw the USB-C PCB to the bottom case using the M2.5 screws Connect the main PCB to the USB-C PCB and place the PCB and switch plate assembly on the bottom case Insert the threaded metal inserts to the top casing Assemble the side bar, Emblem slot and Knob slot on the top casing Place the top casing on top of the bottom casing and screw in using the M3 screws Install the knob and slider Install the switches and keycaps Connect the USB-C cable Enjoy! Note: I have included the STEP files for easy modification.
Download from thingiverse